


Meet Raze, Valorant’s explosive Duelist from Brazil who thrives on chaos, vibrant artistry, and punishing her enemies with powerful explosives. Unlike other Duelists who rely on blinds or dashes, Raze forces her enemies into uncomfortable positions using raw damage and disruptive mobility.
If you’re looking to clear corners, launch nasty site executes, and surprise your opponents with creative satchel plays, Raze is the Valorant agent for you.
Raze’s Abilities

Raze’s kit is all about damage, disruption, and mobility. Master these tools to flush out entrenched enemies, create space, and pull off some of the game’s most breathtaking plays.
Boom Bot (C)
Boom Bot scouts ahead, chasing the first enemy in its path. Its pursuit and explosive payoff can reveal enemy positions or secure a kill on distracted opponents.
| Ability | Damage Output | Range | Cooldown |
|---|---|---|---|
| Boom Bot | Up to 150 damage (direct hit) | 10m travel distance (approx.) | 45s (refreshed each round) |
- Advanced Tips:
- Use Boom Bot to clear tight corners on maps like Bind’s Hookah or Split’s vents.
- Pair it with a Blast Pack for a speed boost, catching enemies off-guard.
- Even if Boom Bot doesn’t land a kill, the audio cue when it spots an enemy reveals valuable information.
Paint Shells (Q)
Paint Shells is Raze’s cluster grenade, splitting into secondary bomblets after the initial explosion. It’s perfect for forcing enemies out of cover or punishing them for playing too close.
| Ability | Damage Output | Range | Cooldown |
|---|---|---|---|
| Paint Shells | 15 – 55 damage per explosion (varies by distance) | ~10m radius overall | 40s (1 charge) |
- Advanced Tips:
- Throw Paint Shells after a teammate’s crowd control ability (like Fade’s Seize) to trap enemies in the blast.
- Use it to deny spike defuses, or flush out defenders when retaking.
- Combine with Blast Packs to rain grenades from unexpected angles (often referred to as the “popcorn” play).
Blast Pack (E)
Blast Pack is Raze’s signature mobility tool. It sticks to surfaces (or enemies!) and can be detonated to knock Raze—or anyone nearby—into the air.
| Ability | Damage Output | Range | Cooldown |
|---|---|---|---|
| Blast Pack | Up to 75 damage (direct stick) | 0.5m radius | 2 charges, 30s refresh |
- Advanced Tips:
- Double Satchel Jumps: Chain two satchels to quickly cover large distances or reach unexpected high ground.
- Wall-Bounce Peeks: Throw a satchel against a wall, detonate it mid-air, and peek corners at an untrackable speed.
- Defensive Trap: Place a Blast Pack in tight corridors. If you hear footsteps, detonate it to disrupt an enemy rush.
Showstopper (X)
Showstopper is Raze’s rocket launcher, dealing massive AoE damage. It’s game-changing for site entry or clutch defense.
| Ability | Damage Output | Range | Cooldown |
|---|---|---|---|
| Showstopper | Up to 150 damage (direct hit) + splash | Large blast radius | 8 points (ult) |
- Advanced Tips:
- Airborne Rocket: Pair Showstopper with a Blast Pack jump to attack from above, catching multiple enemies off-guard.
- Retake Dominance: Fire it into common post-plant spots, denying safe cover or outright eliminating clustered enemies.
- Intimidation Factor: Sometimes the sound of Showstopper alone is enough to stall enemy pushes.
Raze’s Synergy
Raze pairs well with Agents who can group enemies or force them into smaller spaces, making Paint Shells and Showstopper even deadlier.
- Breach: Breach’s Rolling Thunder or Fault Line stuns enemies, letting you lob a perfect Paint Shell for multi-kills.
- Fade: Her Seize or Nightfall groups enemies, guaranteeing chunk damage from your explosives.
- Astra: Gravity Well pulls enemies into a single spot, setting up straightforward Paint Shell or Showstopper kills.
- Sage: Sage’s Barrier Orb can funnel opponents into predictable areas, giving you easy rocket lines.
Best and Worst Maps for Raze
Raze excels in maps with narrow corridors, multiple choke points, and tight angles where her explosives shine.
Best Maps
- Bind: Teleporter plays allow you to coordinate sneaky Boom Bot entries and sudden Blast Pack pushes. Hookah and Showers are perfect for Paint Shell pressure.
- Split: Tight corridors and vertical spaces let you double-satchel onto rafters. Paint Shells are deadly in B main and mid vents.
- Fracture: Multiple zip lines and pinch angles make it easy to isolate enemies with Boom Bot. Blast Pack mobility also helps you rotate or flank quickly.
Worst Maps
- Breeze: Wide-open sightlines diminish the impact of Paint Shells and Boom Bot. You’ll need to master double-satchels to close big gaps.
- Icebox: Verticality isn’t always in your favor here, and enemies can play at extreme ranges. Raze is still viable but needs precise satchels.
- Haven: Three sites can stretch your utility. While you can still excel in close-quarter fights, you’ll often need to rotate quickly or risk being out of position.
Best and Worst Weapons for Raze
Choosing the right weapons amplifies Raze’s explosive style. Her mobility often gives her the upper hand up close, but she can still thrive at medium ranges.
Best Weapons
- Vandal or Phantom: Versatile rifles that complement Raze’s mid-air duels and can finish off enemies softened by Paint Shells.
- Judge: The perfect partner for a double satchel into close range. Mid-air shotgun blasts are a Raze specialty.
- Ghost or Sheriff (Pistol Round): Both are strong openers since Raze can use her kit to displace enemies and line up clean headshots.
Worst Weapons
- Operator: While it can work in some setups, Raze’s kit benefits more from mobility and close/mid-range fights.
- Odin/Ares: Harder to use with Raze’s aggressive, high-mobility style, and they slow you down significantly.
- Shorty: Can be fun for “meme” air plays, but it’s extremely limited outside of point-blank ambushes.
Tips and Tricks for Playing Raze Effectively
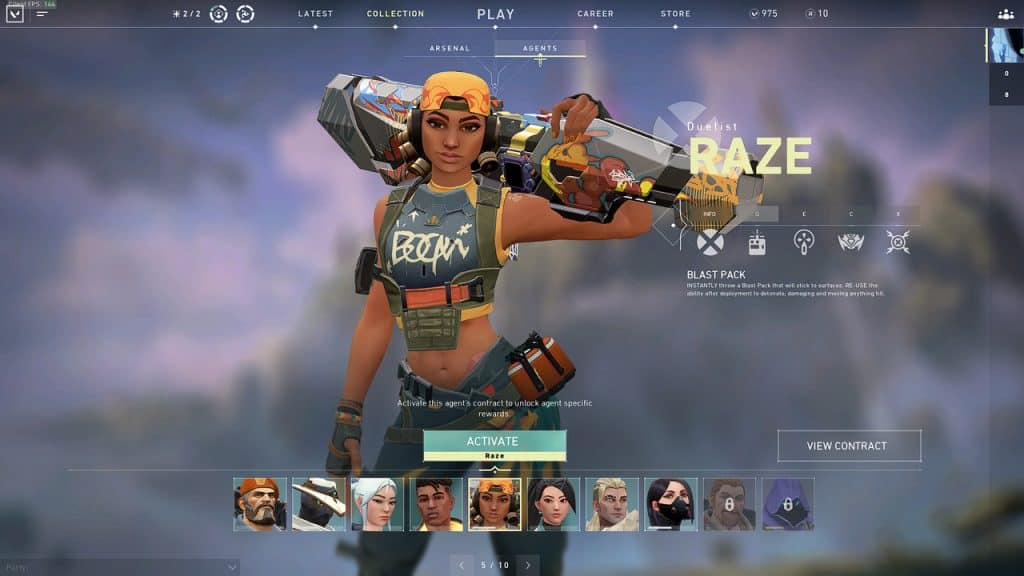
Mastering Raze goes beyond throwing a grenade or firing a rocket. Focus on these advanced details:
- Mind Games: Fake aggression by satcheling near an entry, then hold your ground as enemies panic-rotate.
- Air Strafing: Practice controlling your mid-air movement with satchels so you can peek unexpected angles and land accurately.
- Boom Bot + Blast Pack: Speed up the Boom Bot or send it to one angle, then satchel-jump to another for multi-directional pressure.
- Post-Plant Control: Save a Paint Shell or Showstopper for after the spike is planted. One well-placed explosive can stop a defuse attempt in seconds.
- Eco Round Aggression: Use your mobility as a force multiplier when you’re low on credits. Surprise angles with a Judge or Sheriff can net you easy frags.
Raze in Team Compositions
Raze’s playstyle complements aggressive and combo-heavy lineups. You can break setups, punish foes grouped in corners, and create space for your team.
- With Breach: A stun plus a Paint Shell is almost always a free kill.
- With Astra: Astra’s pull into your Showstopper is devastating.
- With Fade: Enemies caught in Fade’s snare become sitting ducks for your explosives.
- With Sage: Sage’s slow or wall can funnel foes into a perfect rocket corridor.
Raze’s Positioning on the Map
Raze’s positioning is all about leveraging her mobility and explosives to outmaneuver enemies and secure kills.
On Offense
- Explosive Entrances: Use double satchels to fly into sites, but plan your route to avoid easy picks for snipers.
- Corner Clearing: Open with a Boom Bot or Paint Shell to flush out anyone lurking in common angles.
- Fake Outs: Pretend to commit to one site by throwing utility, then pivot quickly if you sense a stack.
On Defense
- Early Information: Launch a Boom Bot down a common lane at the start of rounds to gather intel on enemy pushes.
- Site Anchoring: Deny site entries with Paint Shells. Save a Blast Pack or two for a quick reposition when pressured.
- Retakes: Combine your movement and explosives to sow chaos. Don’t be afraid to Showstopper through a smoke if you predict enemy positions.
Common Mistakes to Avoid
Even seasoned Raze players slip up. Keep these pitfalls in mind:
- Blind Double Satcheling: Jumping in without a plan can leave you out in the open. Ensure you know where you want to land.
- Wasting Boom Bot: Firing it aimlessly at the start of the round squanders its scouting potential. Launch it where you suspect enemies might be lurking.
- Poor Showstopper Timing: Firing the rocket into empty space or waiting too long to shoot after equipping it can lead to easy punishment from alert foes.
- Ignoring Paint Shell Synergies: Paint Shells shine when combined with slows, stuns, or forced enemy movements. Don’t let that synergy go to waste.
- Overcommitting in Large Areas: On open maps (like Breeze), satchel-jumping without cover can get you instantly deleted by rifles or snipers.
Raze’s Lore
Raze (Tayane Alves) is a rebellious street artist hailing from Salvador, Brazil. She loves creating “explosive” street art installations that disrupt the status quo—an extension of her vibrant, outgoing personality. She fought against the Kingdom Corporation’s encroachment on her home, catching the eye of the Valorant Protocol.
Her love for chaos, color, and big booms is evident in every aspect of her kit. She’s close friends with Breach, sharing a history of sabotaging Kingdom’s operations. There’s also a friendly rivalry with Killjoy—Raze’s raw explosive genius versus Killjoy’s methodical tech prowess.
Raze Players to Watch
If you’re hungry to learn from the best, these pro players and streamers consistently showcase advanced Raze gameplay:
- cNed (Natus Vincere): Aggressive pushes and razor-sharp aim.
- Yay (Cloud9): Primarily a Jett star, but known for lethal Raze entries.
- Derke (Fnatic): Consistently top-frags with high-pressure Raze plays.
- TenZ (Sentinels): Renowned mechanical skill, with nasty satchel shots.
- Flights: A community favorite streamer who specializes in creative movement and double satchel dominance.
Conclusion
Raze is all about taking space with a bang. By combining explosive utility with precise movement and timing, you can wreak havoc on the enemy’s defense—or tear through their offense. Her kit rewards players who take the time to master satchel jumps, mid-air control, and creative Paint Shell usage.
Keep refining your ability combos, stay unpredictable, and seize every opportunity to show the other team just how big your explosions can get.

